The newest iPhones—especially the 15 Pro series through the upcoming 17 Pro—blur the line between smartphone and pro-grade camera. Stacked 48 MP sensors, faster A-series image signal processors, and Apple’s on-device “Apple Intelligence” unlock techniques that previously required DSLRs, ND filters, or desktop editing suites. Below are the most effective ways to turn those hardware and software upgrades into consistently stunning photos and videos.
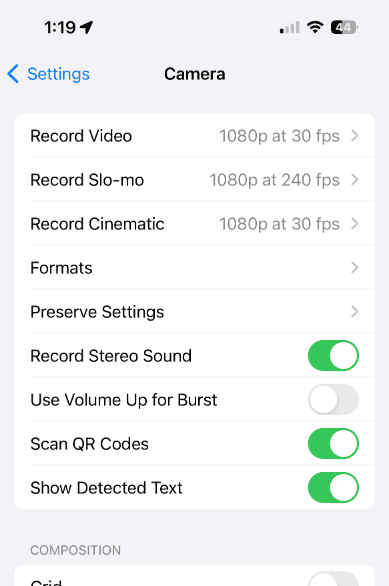
1. Start With Perfect Baseline Settings
2. Harness New AI Features
3. Explore Advanced Shooting Modes
4. Unlock Multi-Camera Power
5. Push Beyond the Native App
6. Accessory Hacks the Pros Swear By
7. Creative Experiments to Try Tonight
Quick Checklist
Apply these techniques and you’ll squeeze every pixel of performance from your iPhone camera—producing images that stand comfortably alongside shots from far pricier rigs.
Key Takeaways
Mastering iPhone Camera Settings
When using youriPhone camera, tweaking the right settings can make a big difference. Let’s look at how to finesse these options for the best photos.
Adjusting Exposure and Focus
To adjust exposure on your iPhone, tap the screen and find the sun icon next to the focus point. Drag it up or down to brighten or darken the shot. Dial in the focus by tapping where you want the image to be sharp. This gives you control over which elements stand out.
Exploring Portrait Mode and Depth of Field
Portrait mode creates a depth effect, blurring the background while keeping the subject sharp. Find Portrait mode in the camera app and select it. Move around until the depth effect activates. You can enhance the background blur for a more striking image, similar to what you might achieve with a DSLR.
Utilizing AE/AF Lock for Sharp Images
For sharp photos, even with moving subjects, use AE/AF Lock. Tap and hold on your subject until you see AE/AF Lock at the top of the screen. This locks in both the exposure and the focus, ensuring that your subject stays in sharp relief, no matter the movement.
Experimenting with Burst Mode and Live Photos
Burst mode captures a series of photos at once — perfect for action shots. Hold down the shutter button to activate it.Live Photoscapture a snippet of motion before and after the still. Toggle these options in the camera app to add life to your images.
Leveraging Advanced Controls in Pro Mode
For users with aniPhone Pro or Pro Max, Pro mode offers DSLR-like settings. In the Settings app, turn on ProRAW to gain control over advanced image processing. On the Pro Max, set ProRAW Max or HEIF Max for the best quality. Pro mode enables fine-tuning of exposure settings and other adjustments in the camera app itself.
Creative Techniques and Composition
In this section, we explore various methods to enhance your iPhone photography skills, focusing on composition, lighting, and camera settings.
Applying the Rule of Thirds and Composition Guidelines
The rule of thirds is vital in photography. By dividing the frame with two horizontal and two vertical lines, you create nine equal segments. Place the main subject at the intersections or along the lines to make the photo balanced and allow for a more engaging interaction with the viewer. In addition to the rule of thirds, observe your scene for patterns, symmetry, and framing opportunities for more compelling compositions.
Taking Advantage of Lighting and Filters
Light plays a crucial role in photography. Natural lighting can create photos that feel alive. Look for the golden hour, shortly after sunrise or before sunset, when the light is soft and warm. Use the iPhone’s built-in filters to enhance the mood. Whether you’re seeking a dramatic effect or a subtle tone, filters can help achieve the desired outcome without editing the photo afterward.
Capturing Motion with Shutter Speed and Panning
Controlling shutter speed allows you to capture motion clearly or create a blur that conveys movement. On the iPhone, you can use the Live Photo feature and edit the photo later to freeze a moment in time. For dynamic shots of moving subjects, try panning. Move the camera along with the subject at the same speed while taking the photo to keep the subject in focus against a blurred background.
Using Tripods and Accessories for Stabilization
A tripod is a photographer’s ally, especially in low-light conditions or when precision is key. It stabilizes the iPhone for sharp, clear images. Use a tripod with a smartphone mount to avoid camera shake and ensure tack-sharp photos. For more stability while shooting, use the self-timer function or a remote shutter.
Shooting in Various Modes: Pano, Time-Lapse, Portrait
Experiment with the iPhone’s camera modes to capture diverse images. Use Pano mode for sweeping landscapes, ensuring you move the camera steadily from one side to another. Try Time-Lapse to show the passage of time in a video format, ideal for capturing scenes like busy streets or sunsets. In Portrait mode, use lighting options to add depth and focus to your subject, separating it from the background for a professional look.